 |
| Blank walls screaming for my art :P |
This week was peppered with
lots of things – highs and lows – as per usual (on sometimes a daily basis).
One big high point was being able to travel to Grand Rapids, Michigan with my
dad and install my work at ArtPrize.
 |
| That's juice. |
That was a HUGE deal – though, to be
honest, I was feeling pretty worn out from school and starting to get a cold so
it was a bit tiring… but luckily I have the best dad who put up with all my
crabby sick whining and helped me set everything up. I am truly miserable
company when I’m sick, so this is a shout-out to my dad and my friend Sarah who
both helped with install for the many hours it took my cold-pill-addled brain
to do math and hammer nails– you were the best people I could have asked for to
help me make my artwork look fancy and level and nice. I am indebted to you for
always. If I won.. I would have bought you nice things..

On that happy note, the week
at school started off in the high school art room. I did not have any lessons
planned for the elementary school on Monday so I stayed in the high school room
allllll day. And worked. And blasted music. And ate snacks. And worked worked
worked!

I threw my hat in the ring
to work on a pinch pot bowl with the ceramics students and was pleasantly
surprised to find I do not totally fail at clay! I like my little tea bowl… I’m
excited to glaze it in the coming weeks.
The majority of my 7th
graders started gluing their tissue paper into their stencil designs and were
hitting the whole project out of the park! Mr. Keller and I were hanging them
on a clothesline across the room to dry – too funny. Art laundry, anyone? Truly
the project was really starting to come together nicely by the end of the high
school art day. And then it was time for me to hit the clay. Hard.


I was developing a lesson
from one of my conference freebies – a lesson plan from Amaco glazes that
utilized an extruder. Now… if you know anything about Ms. Kanak you know that
she is a little.. tiny.. bit afraid of working with clay. This lesson looked
really cool, though! Students could use the extruder with a square die in the
middle to create a hollow box-type form. After installing the extruder one
student pushes down on the lever to force the clay through and the other twists
the clay as it comes out of the bottom. There were some difficulties… like Ms.
Kanak used clay that was too wet so it just fell apart. Attempt two went better
– after some SERIOUS wedging of the clay – but I should have had someone to
help with the manipulation of the extruded clay cause uhh… I only have two
hands and not a lot of patience with clay in the first place haha! But in the
long run – the very long run. Like 5 extruded pieces later – I ended up with a
workable couple of chunks and stored them for samples. I made sure to make a
passable example along with a what probably should have been pitched example… I
began to create surface treatments with my examples as they dried out more.
 |
My
tiny teacher’s sample was mainly to demonstrate surface treatments and textures
that could be incorporated into the final designs. I also had some time to work
on the next project for 7th grade, sugar candy skull portraits. More
on that later...
Students were really
struggling with their volume levels so we repeatedly taught voice levels and
expectations in the middle of their work time. I do not mind talking while they
work, but some of them were basically yelling across the room for one reason or
another. I think a big part of it was early finishers – they did not bring
activities to work on. Some of them had books to read with them or their
computers, but most of them were just sitting bored, waiting for something to
do.


 7th grade
provided a complete turnaround on behavior! Students came in to the classroom
quietly and picked up their materials to work. Students that were already
finished with the assignment took their seats. I pulled up my presentation for
the new lesson: Day of the Dead sugar candy skull self portraits – kind of a
mouthful, but the students were excited about it. I reminded them of my
behavior expectations before I started the presentation and they were all
engaged and participated in the class discussions and questions I presented.
The objective for the day was to find a minimum of 3 images of sugar candy
skulls they could use for inspiration or reference. After they found images
they needed to do an interest inventory – aka write down hobbies, foods,
favorite things etc. that could be translated into visual symbols or shapes.
When they completed those two tasks they would be given drawing paper. After
the presentation I distributed xacto knives to the students who needed them and
provided tar paper for students who were moving to the next step in the stained
glass project. I told them if they could work quietly (voice level 1) for ten
minutes that they would have music playing in the background as a reward. We
had some disagreements on choice of station, but teacher says what goes through
the loudspeakers! Students followed the direction and remained quiet for the 10
minutes, working diligently on cutting out stencils, researching, and gluing. A
couple of students arrived late from taking a test so I caught them back up using
the presentation and the teacher sample I started. I emphasized the use of
symmetry in their skull designs and showed them how to transfer and trace their
skull in sections. About 3 students started work on their skulls today.
7th grade
provided a complete turnaround on behavior! Students came in to the classroom
quietly and picked up their materials to work. Students that were already
finished with the assignment took their seats. I pulled up my presentation for
the new lesson: Day of the Dead sugar candy skull self portraits – kind of a
mouthful, but the students were excited about it. I reminded them of my
behavior expectations before I started the presentation and they were all
engaged and participated in the class discussions and questions I presented.
The objective for the day was to find a minimum of 3 images of sugar candy
skulls they could use for inspiration or reference. After they found images
they needed to do an interest inventory – aka write down hobbies, foods,
favorite things etc. that could be translated into visual symbols or shapes.
When they completed those two tasks they would be given drawing paper. After
the presentation I distributed xacto knives to the students who needed them and
provided tar paper for students who were moving to the next step in the stained
glass project. I told them if they could work quietly (voice level 1) for ten
minutes that they would have music playing in the background as a reward. We
had some disagreements on choice of station, but teacher says what goes through
the loudspeakers! Students followed the direction and remained quiet for the 10
minutes, working diligently on cutting out stencils, researching, and gluing. A
couple of students arrived late from taking a test so I caught them back up using
the presentation and the teacher sample I started. I emphasized the use of
symmetry in their skull designs and showed them how to transfer and trace their
skull in sections. About 3 students started work on their skulls today.


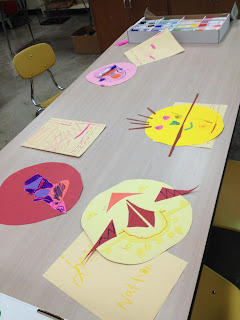
 Thursday was a bit hectic..
we had our block schedule so we had double-time for drawing students and I took
the opportunity to plan new lessons and projects. First grade were finishing up their Dot Day
projects, adding lines and details with markers. They did an awesome job – lots
of mustaches. I dunno what it is about mustaches.. but elementary is all about
them. 3rd grade were starting Brain Machines, which is a lesson I
developed recently. The challenge was not the lesson objectives themselves..
but the lead-up to work time. One of the steps was to have the students STAND
STILL in front of a lamp so we could trace their silhouettes onto paper…. Lesson
plans coming soon!
Thursday was a bit hectic..
we had our block schedule so we had double-time for drawing students and I took
the opportunity to plan new lessons and projects. First grade were finishing up their Dot Day
projects, adding lines and details with markers. They did an awesome job – lots
of mustaches. I dunno what it is about mustaches.. but elementary is all about
them. 3rd grade were starting Brain Machines, which is a lesson I
developed recently. The challenge was not the lesson objectives themselves..
but the lead-up to work time. One of the steps was to have the students STAND
STILL in front of a lamp so we could trace their silhouettes onto paper…. Lesson
plans coming soon!


Tuesday was back to work as
per usual. For 7th grade, it was a work day. The majority of the
students moved on to their tar paper stencils, except for a select few who were
either working very slowly because they were distracted (or distracting others)
or they were absent and catching up. And still some other students just tend to
create more complicated designs than others and are now seeing the consequences
of complex art production! Not that I’m complaining – it’s great to see them so
engaged in their project.
I had the students who finished their project (or so they thought) glue the
opposite side and do touch-ups. When they were done gluing I asked them to
write about their piece. “Why did you choose to depict this? What is special
about this place/object/idea?” There were several times where Mr. Keller and I
were reminding the students of the classroom voice levels and they did not earn
music. I spoke to all of them at the end of class, after they were cleaned up,
and explained my expectations for their behavior and in turn their work ethic.
They’re almost all hard at work; they just need to keep their voices quieter
while they do so. There were also a couple of behavioral issues between
students, which were remedied by proximity and redirecting. I am going to make
some seating chart changes for this group, I think. There are a couple of
students who seem to be making more problems than they are solving with their
behaviors and talking.

After 7th grade
it was back to the elementary school to finish up one round of Dot Day
projects! The students were able to add details with marker and were encouraged
to use pattern, line, shapes, outlines, overlap – the whole pile of art terms.
They did a great job! And they all made very handsome and beautiful dot people
as well. I was very proud of their work and they were excited to take their
dots home to show off.


Wednesday was a very
productive work day for all classes! Everyone was making major headway with
their projects and things were really starting to take shape. Sometimes a work
day is the best thing for students- time to process and think about their art
is invaluable, especially if they are working on personal themes or ideas. I
tried to encourage all of my advanced students to incorporate their interests
into their work as much as possible. Ceramics students should use favorite
patterns or techniques, painting and drawing students should either work from
memory or create their own source images – originality and sources are
important. We should be encouraging students to make art about what they care
about – not necessarily what we see as being ‘worthy’ of reproduction or
product.


 7th grade
provided a complete turnaround on behavior! Students came in to the classroom
quietly and picked up their materials to work. Students that were already
finished with the assignment took their seats. I pulled up my presentation for
the new lesson: Day of the Dead sugar candy skull self portraits – kind of a
mouthful, but the students were excited about it. I reminded them of my
behavior expectations before I started the presentation and they were all
engaged and participated in the class discussions and questions I presented.
The objective for the day was to find a minimum of 3 images of sugar candy
skulls they could use for inspiration or reference. After they found images
they needed to do an interest inventory – aka write down hobbies, foods,
favorite things etc. that could be translated into visual symbols or shapes.
When they completed those two tasks they would be given drawing paper. After
the presentation I distributed xacto knives to the students who needed them and
provided tar paper for students who were moving to the next step in the stained
glass project. I told them if they could work quietly (voice level 1) for ten
minutes that they would have music playing in the background as a reward. We
had some disagreements on choice of station, but teacher says what goes through
the loudspeakers! Students followed the direction and remained quiet for the 10
minutes, working diligently on cutting out stencils, researching, and gluing. A
couple of students arrived late from taking a test so I caught them back up using
the presentation and the teacher sample I started. I emphasized the use of
symmetry in their skull designs and showed them how to transfer and trace their
skull in sections. About 3 students started work on their skulls today.
7th grade
provided a complete turnaround on behavior! Students came in to the classroom
quietly and picked up their materials to work. Students that were already
finished with the assignment took their seats. I pulled up my presentation for
the new lesson: Day of the Dead sugar candy skull self portraits – kind of a
mouthful, but the students were excited about it. I reminded them of my
behavior expectations before I started the presentation and they were all
engaged and participated in the class discussions and questions I presented.
The objective for the day was to find a minimum of 3 images of sugar candy
skulls they could use for inspiration or reference. After they found images
they needed to do an interest inventory – aka write down hobbies, foods,
favorite things etc. that could be translated into visual symbols or shapes.
When they completed those two tasks they would be given drawing paper. After
the presentation I distributed xacto knives to the students who needed them and
provided tar paper for students who were moving to the next step in the stained
glass project. I told them if they could work quietly (voice level 1) for ten
minutes that they would have music playing in the background as a reward. We
had some disagreements on choice of station, but teacher says what goes through
the loudspeakers! Students followed the direction and remained quiet for the 10
minutes, working diligently on cutting out stencils, researching, and gluing. A
couple of students arrived late from taking a test so I caught them back up using
the presentation and the teacher sample I started. I emphasized the use of
symmetry in their skull designs and showed them how to transfer and trace their
skull in sections. About 3 students started work on their skulls today.
Steps:
Step 1: find 3 images
through research of Dia de los Muertos
Step 2: type or write up
interest inventory
Step 3: raise hand for
activity approval by Ms. Kanak
Step 4: begin drawing –
think about symbols, logos, objects – how would you translate your interests
and hobbies into visual language?


I have two students in
this class who are reluctant learners. Student 1 keeps to herself and works
quietly, but she is easily discouraged and tries to do ‘easy’ versions of the
project. She kept presenting me with her drawings and ideas and I kept pointing
out the white space on her paper – she didn’t like that. But she went back to
her images and started drawing all the same – eventually filling up the white
spaces with images and patterns.

Student 2 is a reluctant
learner as per the dictionary definition. He looks for shortcuts, constantly
becomes distracted from his work, becomes discouraged easily and threatens to
give up, and bothers his classmates with talking and touching of their
projects. Most of his classmates keep him in check or they physically remove
themselves from where he is sitting so they can work without being bothered.
Today Student 2 was, for lack of a better term, whining about the assignment
and was repeatedly asking when we were leaving, when we had to clean up, if he
could quit…. Quitting is not something I want to encourage or allow in my
classroom so I stood firm. I told him he could take a five minute break and
work on the other assignment. His response “but I am going to have to come back
to this, aren’t I?” YEP. When he realized that he went back to work on cutting
out his tar paper stencil and with 40 minutes left in the block he completed
it! Not without some more moaning and groaning, of course. But he did finish
the stencil and then moved on to gluing the tissue paper… which he struggled
with. He was too busy bothering the girl sitting across from him. I redirected
his behavior back into the project and looked up to notice we were nearly to
the clean up time. I told him to clean up his area and prepare his stencil for
storage, which he did, and then he returned to his seat and chatted with some
classmates who really wanted nothing to do with him. Students were given an
earlier clean up time because of the messes made from cutting and gluing. They
put up their chairs and we had about three minutes of wait time at the end
before the bell rang so I gave them time to talk and visit with each other. I
thanked them for their good behavior and sent them to their next classes. 3
students started work on their skull designs, 2 students were gluing and
cutting tissue paper today, and the remainder of students were working on
finishing their tar paper stencils.
I assisted at the elementary
school but did not teach on Wednesday. I used that time to prep for my other lessons
and project ideas..


 Thursday was a bit hectic..
we had our block schedule so we had double-time for drawing students and I took
the opportunity to plan new lessons and projects. First grade were finishing up their Dot Day
projects, adding lines and details with markers. They did an awesome job – lots
of mustaches. I dunno what it is about mustaches.. but elementary is all about
them. 3rd grade were starting Brain Machines, which is a lesson I
developed recently. The challenge was not the lesson objectives themselves..
but the lead-up to work time. One of the steps was to have the students STAND
STILL in front of a lamp so we could trace their silhouettes onto paper…. Lesson
plans coming soon!
Thursday was a bit hectic..
we had our block schedule so we had double-time for drawing students and I took
the opportunity to plan new lessons and projects. First grade were finishing up their Dot Day
projects, adding lines and details with markers. They did an awesome job – lots
of mustaches. I dunno what it is about mustaches.. but elementary is all about
them. 3rd grade were starting Brain Machines, which is a lesson I
developed recently. The challenge was not the lesson objectives themselves..
but the lead-up to work time. One of the steps was to have the students STAND
STILL in front of a lamp so we could trace their silhouettes onto paper…. Lesson
plans coming soon!


After brain machines were in storage for 4th grade it was time to bring half the fifth grade back to finish up Life maps. I have a lesson plan coming for this soon!


Week
4 ended at NMU, where I was attending my student teaching seminar. We basically
went over the syllabus and talked a little bit about how things were going in
our individual classroom placements… if I am being completely honest I would
have benefited more from teaching that day instead! And it would have been more
fun and organized than dropping everything to travel. Anyway, couple of posts
coming up with individual lesson plans (with pictures!)
Thanks
for reading, come again!
Ms.
Kanak


